Showing posts with label DIY. Show all posts

Friday, December 23, 2011

Tutorial: Circle Scarf for Beginners

I found a super cute circle scarf at Ross' a few weeks ago. And I love it. Some days at work I hate to have the ends of a scarf dangling in my way, so this new-fangled thing affords me my favorite accessory without the hassle.

I have been really itching to make one...so of course...as you well know...I don't really do anything in small proportions...so...I decided to make 6.

And they turned out really, really, really awesome! Now...I have sewn 7 times. Once to make a pillow with my mom...and the 6 scarves I made today. That's it. So this really is for beginners.
(one of) the finished product(s).

First I went over to JoAnn's Fabrics and looked for a soft, yet easy-to-sew fabric. I stumbled upon a 60% Off Sale on flannel fabrics. They were so soft, came in really cute colors and patterns, and looked pretty easy to sew. I was wearing my circle scarf at the store, so we figured I would need about 1 and 7/8ths yards of fabric to get the required length.

Then I cut the fabric in half on the fold from the bolt of fabric so I could make 2 scarves for each cut of the fabric I purchased. Which if you are penny savvy like I am...each cut was ~$6.00 (w/tax) making each scarf only ~$3.00. cha-ching.


Then I folded the fabric in half, inside-out, and pinned the edges to keep the fabric still when I started to sew.

I folded and pinned all of the scarves first

then I picked out some thread

and then I set up the sewing machine
 You will need to sew along the edge that you have pinned. Once you have done that, turn the fabric so that it is right-side-out. Then you will need to take the two circular ends of the scarf and hold them together with your fingers so that the inside of the fabric faces up and sew around the circle until you can't really move the fabric to sew any more. Hand stitch the last little bit using a needle and thread.

Now please excuse my embarrassing modeling...but here is how it works. 

see...it's a circle...
put it around your neck so that the seam is down (and the hand sewn part is facing your neck)

creepily twist the fabric and put it over your heard

this is what it looks like

here is the other fabric


from the side. you can tame it just a bit to make it a little smaller.

the two final products.


This is a really easy way to make your own accessory. For about $3.00 a scarf, and a little sewing machine work, you can have a beautiful winter scarf.

PS tomorrow is Christmas Eve!!!!

I'm linking this up over here with this Pretty Clever idea.

lollipops

Tuesday, December 20, 2011

DIY: Wrapping Up Christmas

We are just 4 days from Christmas Eve! I am getting super excited :)

Monday I finished all of our Christmas shopping and spent the afternoon leisurely wrapping them while watching a few holiday movies.

I used craft paper, some felt, an old red sweater, green ribbon, twine, my hot glue gun and 3 rolls of paper, a few rolls of ribbon, and beautiful tags from Target--all 60% off after Christmas last year.

Here is how it turned out...
dressed up & casual wrapping ideas
brown bag $.50...dress it up with scraps of ribbon and rosettes

i'm loving these sweater and eyelet trim rosettes

i've been feeling stripes of late

more rosettes

i love how the eyelet fabric gives this brown bag a feminine twist

names spelled with twine instead of tags

felt flower instead of a bow

the twine and sassy green tag dress up this craft paper wrapping

lines of twine


I love the stripes of twine and ribbon
business casual
super cute...right?

big ole golden bow

green, red & gold

i think this one is my favorite. the eyelet trim with the twine bow are super cute

C for Miss Cindy
What kinds of fun wrapping tricks have you used before?

Oh and be looking for some holiday treat recipes coming up in the next few days!

Tuesday, December 13, 2011

Presents Under the Tree

I seriously love Christmas. My mom always brought so much Christmas cheer to our home growing up. I remember her taking us on walks through the woods to cut down a small tree to put in our bedroom or on the deck, collect greenery to decorate the fireplace, and have Dad shoot down some mistletoe from a treetop. During the Christmas season we did everything together. We would decorate the tree(s) together, go Christmas shopping together, wrap presents together, bake cookies together, go caroling together...you get the picture. I think Christmas is my favorite time of year because I love being with my family, loving them, loving our church and our community...that's what Christmas has meant. Yeah presents are fun...but none of my presents would have meant very much to me if they weren't part of season all about loving others and giving to others out of genuine, Christ-like generosity.

I think I enjoy giving presents more than getting them. And I love wrapping them. Last night I took a little time to get started and I had a lot of fun. I think this year I am going for a Country Christmas theme...if you haven't already you can see that my mantle is a little country-rustic. I followed that theme into the present-wrapping last night.

I used craft paper to wrap some, and the red damask I found for 60% off at Target on the after-Christmas sales last year. The Christmas tree tags and gold bow were also at least 60% off last year as well.


 This is my favorite.


I used a hot glue gun to spell one letter at a time, and then wrapped the twine to spell her name. 


I made a simple felt flower and sewed a mini-pearl button on it in-lieu of a bow.


I love the simple brown paper with twine and the glittery green tag to add some color.


I wrapped one of my sister's presents in a mason jar, tied twine around it and topped it with a red felt flower.


Oh...and remember I mentioned a cedar tree...well I actually have 3 in my back yard. So I cut off some little branches to add a lil' greenery to the mantle.


I love my Jim Shore Santas.


What colors do you like to wrap with? I never would have pegged myself as a red girl...but I am really feeling the red this Christmas!


Ps...if you haven't yet...don't forget to find out how you can win a Felt Pendant on my blog on Thursday!

Thursday, December 8, 2011

Christmas is in the Air

At long last...a few minutes to blog. Whew.

We moved on Saturday with the help of some good friends and we are finally starting to get settled into the new house! 

Obviously my plan of attack was the kitchen first. I have literally been digging through my bedroom closet each morning to scramble up something to wear to work. But no fear, all of my pyrex, kitchenaid, tupperware, cuisinart goodness was cleaned and tidily stored away in the kitchen cabinets. 

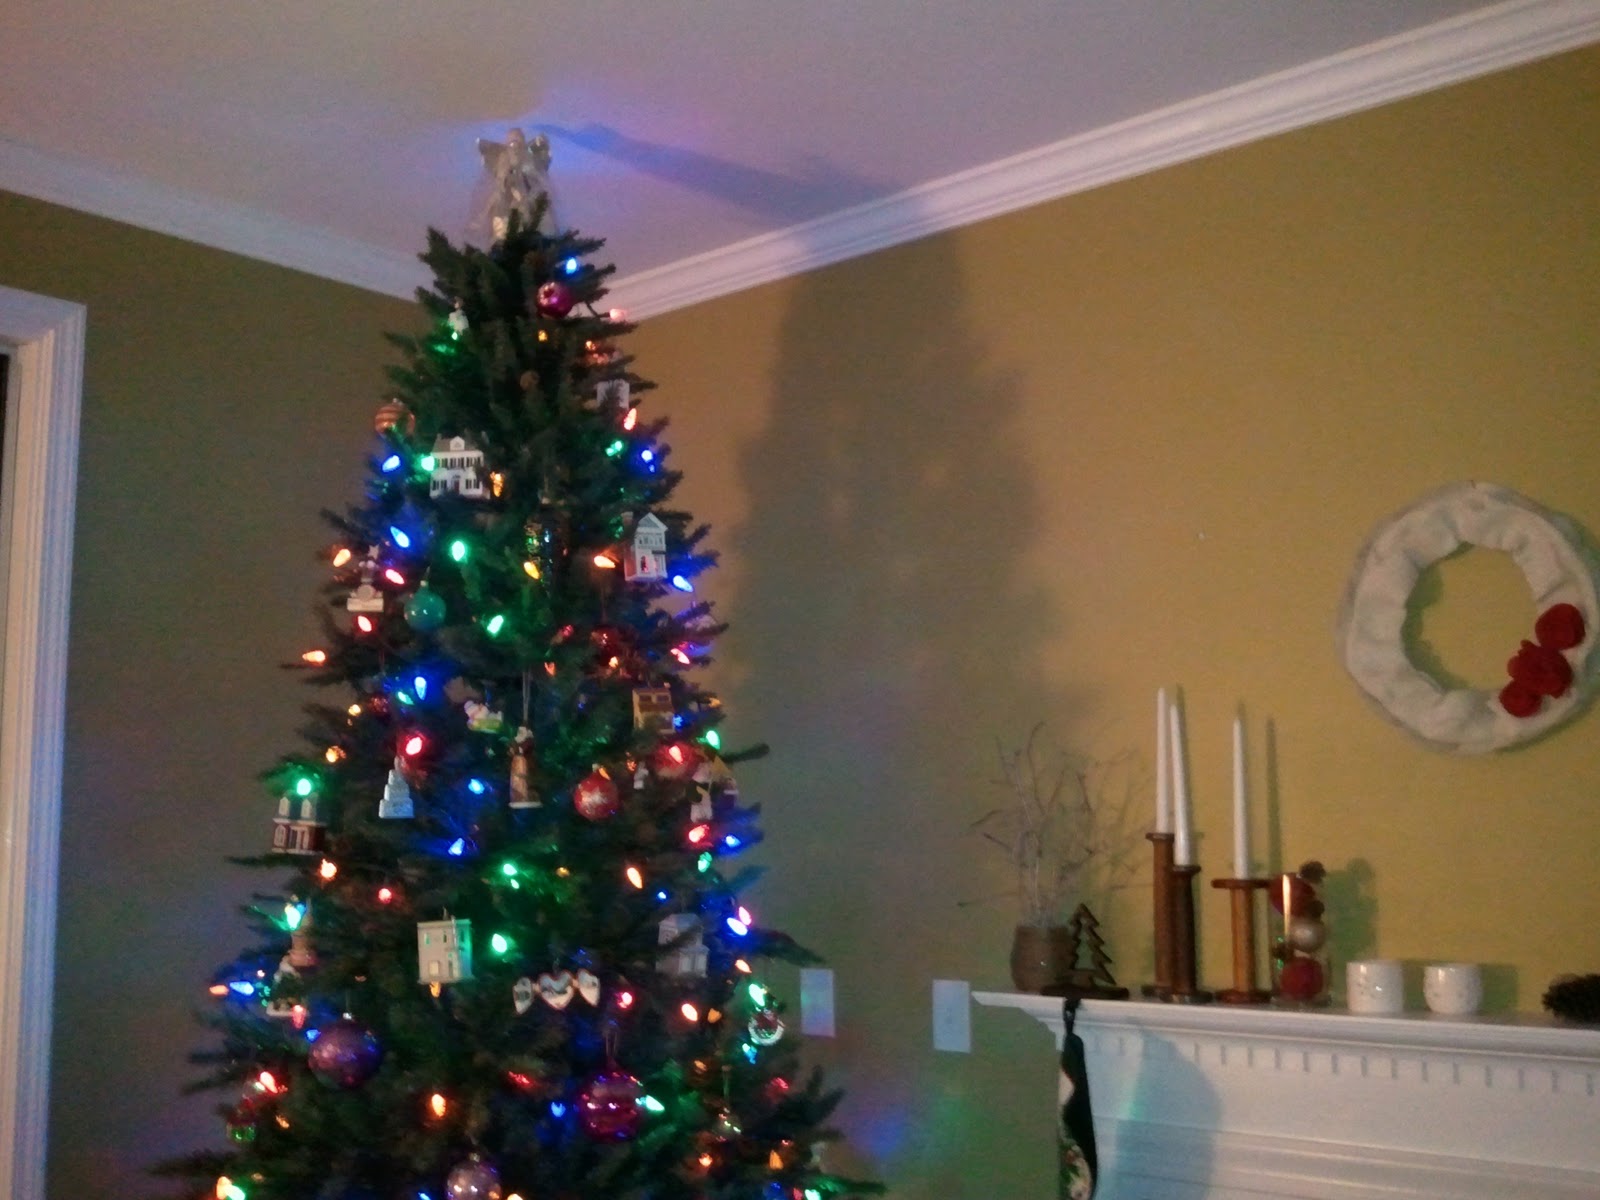
Wednesday night, I put up my Christmas tree....while watching The Polar Express...and eating marshmallows. I started on Saturday while viewing Elf for the first time this season, but I was missing a few metric bolts to lock the tree into the stand. It is up now though, and I love looking at my collection of Nostalgic Homes by Hallmark that my mom started collecting in 1984 the year before I was born. This is the 28th year the collection has been going and I have every one!

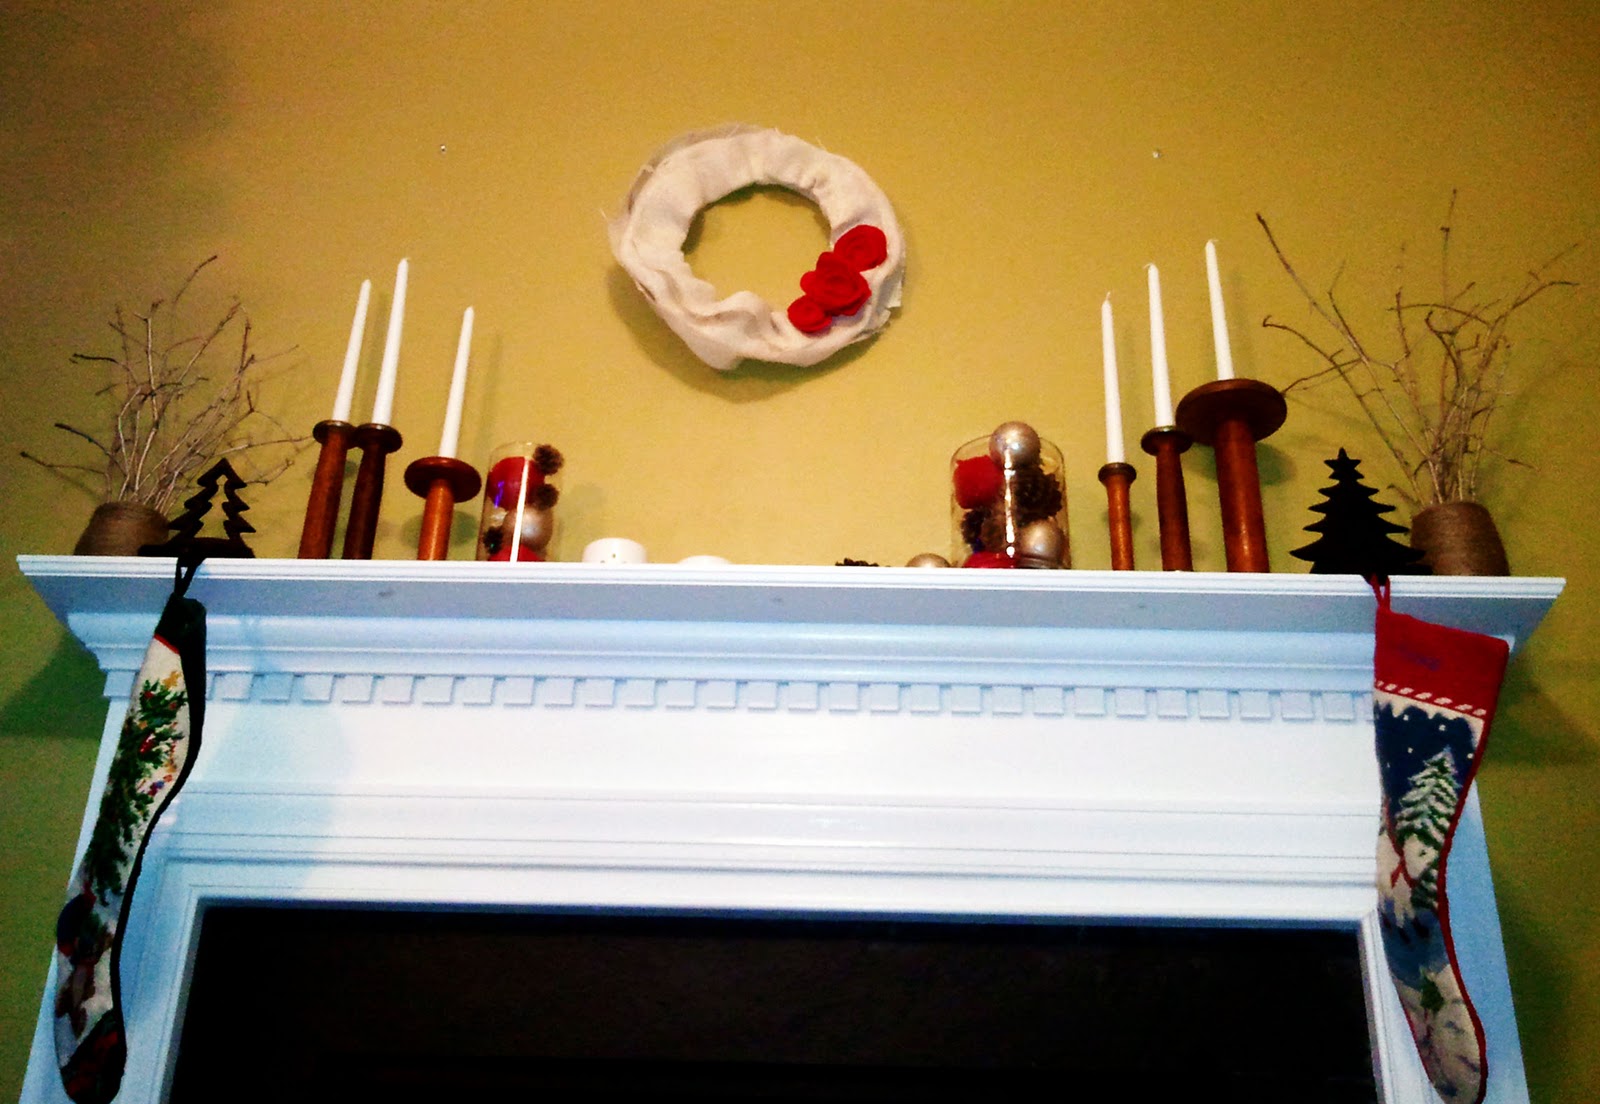
Tonight I put together our Christmas mantle. I have never done something like this, so this was kind of a lesson in crafting for me. After a pretty stressful week with the move, it was so nice to relax and get into the holiday spirit.


Now let's break it down...


My mom had these old wooden spools in her attic. I remembered them from my childhood while perusing Etsy one night and asked my mom if I could have them. They look great as candle holders.

The stocking hangers were purchased at Target at the end of the season a few years ago for $5 each.


I had some silver ornaments that I bought a Walmart a few years ago to decorate a second tree that I gave up in the move. I painted some of them a light gold color and wrapped some of them in strips from an old red sweater to add some more color. 


Forrest and I went for a run a few weeks ago and picked up the big pine cones featured on the mantle. The small cones were pulled from a Christmas swag I bought for $1 at the Dollar Tree last year. Also the two small candle votives were purchased at the Dollar Tree for $1 each.  


I bought some burlap a few weeks ago, but hadn't had a chance to use it yet. I made this wreath using a wire coat hanger, burlap, and some felt to make the flowers.


I bought two vases from the Dollar Tree and wrapped them in twine. This past weekend I picked up some twigs in the yard and saved them to make this! I spray painted the twigs and then stuck them into the vase using that green flower base stuff to keep them from falling all nimbly-bimbly like. 


Total Cost of the Christmas Mantle = $13.87
Burlap ~ $2.00 @ Hancock Fabrics
Felt for rosettes ~ $.40 for 2 at Walmart
Candles ~ $3.00 for 6 at the Dollar Tree
Spray Paint ~ $3.47 at Walmart
Votives ~ $2.00  for 2 at the Dollar Tree
Vases ~ $2.00 for 2 at the Dollar Tree
Green flower foam ~ $1.00

What I had around:
pine ones (small & big)
twine
burlap
hot glue gun
silver ornaments
old red sweater
stocking hangers
stockings with our names from JCPenny
old wooden spools


This is our 9 foot Christmas tree. We have to go artificial because I have allergies :( My little angle touches the ceiling, but she fits! I need another tree because I have about 2 boxes of ornaments..including a collection of Winnie the Pooh story books from Hallmark that didn't make it on the tree this year.  :(


When coming up with my ideas for the mantle, I turned to Pinterest. Here are some of the images that inspired me.

I looked for this glittery paint, but didn't find any. I think I like the milder gold I chose to use better anyway.


I need to add some green to the mantle to go with my stocking. There is a cedar tree right at the line between my neighbors yard and ours....I am going to ask them this weekend if I can cut some of it!


I still want to add a banner with some Christmasy word to hang down from the mantle. I was going to use the burlap to do that. I am going to work on that this weekend.


This was what inspired my use of the pine cones.


I wasn't going to use red, but then I realized that almost all of my holiday mantle pins had red in them, so I knew I was drawn to that. I decided not to fight my instincts.


What kind of mantle-decorating have you been up to?